Sunday, February 1, 2015

Sundays from Scratch - For the Love of Gluten!

I'm not afraid to say it - I love gluten! When I first became vegan, I lived for seitan - aka gluten or the "wheat meat" which is incredibly high in protein and even higher in deliciousness! Nowadays eating gluten-free is the big thing, but is something I will never embrace. It has always been my view that people who do not have a specific condition requiring a change in diet don't need to follow a particular restricting diet. If I'm not allergic to peanuts, or soy, or gluten, then why should I avoid it? On that note - bring on the gluten!!

I have a few recipes to share today, although I sadly do not have pics of all of them to share with you. I really like blog posts with lots of pictures, so hopefully I will be able to add in more pics later. Although, truthfully, seitan is not the most beautiful food to look at. 

The first recipe is the one I use most, a standard boiled seitan. This is easily doubled or tripled; my kids love to take this in their school lunches so I always at least double the recipe. 

For the dough:
3/4 cup vital wheat gluten 
1/4 cup nutritional yeast 
2/3 cup water 


Broth #1 - a lighter broth, for use in soups or for nuggets, and in my "poultry" style recipes. 

2 1/2 cups vegetable broth (I usually use 2 1/2 cups water and 1Tbsp organic vegetable Better Than Bouillon)
1tsp Montreal Chicken Spice
1/4 tsp ground sage 
1/4 tsp ground thyme 
1/4 tsp oregano 
1Tbsp Braggs liquid aminos
1 1/2 tsp olive oil 

Broth #2 - a darker broth, for stews or more "beef" - style recipes 

2 1/2 cups vegetable broth (I usually use 2 1/2 cups water and 1Tbsp organic vegetable Better Than Bouillon)
1tsp Montreal Steak Spice
1/2 tsp seasoned salt
1Tbsp Braggs liquid aminos
1 1/2 tsp olive oil 

Directions: 

Heat all broth ingredients in a medium size pot over med - high heat. Bring it just to a boil, then lower to a simmer. 

While the broth is heating up, sift together the gluten and nutritional yeast in a medium size bowl. Add water and stir to combine, until everything is wet. You may need to knead the dough a bit to make sure you don't have dry spots, but don't handle it too much. You should have a big blob of wet dough. From here you can cut it into whatever shape you desire, keeping in mind that it will grow a bit when cooking. I usually cut it into 1/2" chunks, but you could also cut it into strips or patties. Bigger pieces will need to cook longer than smaller pieces. 

Place your dough pieces into the simmering broth, and cook for 45 minutes to 1 hour, depending on the size of your chunks. You'll need to stir them every 10 minutes - they'll puff up a lot, then settle back down when you stir them. 

You can test that they're done by cutting a piece in half. It should no longer be gooey inside. 

Do not allow it to boil dry, and store any leftover seitan in the juice. 


The 2nd recipe I'm going to share today is a completely different style of seitan. It is steamed, and so it has a much smoother, uniform shape. I use this recipe on holidays, in place of tofurky. I really do love tofurky, but the tofurky roasts are much too small to feed the entire family, take too much time in the oven, and can be a bit pricey. I've grown to like this recipe much more than the traditional tofurky roasts. 

Ingredients: 

1 15-oz can beans - either pinto, great northern or garbanzo will work just fine
1 1/2 cups water
3 Tbsp Organic Vegetable -flavor Better Than Bouillon 
4 tsp olive oil 
1 1/2 Tbsp Braggs Liquid Aminos 
2 tsp Montreal Chicken Spice
1/2 tsp ground sage
1/2 tsp ground thyme
1/2 cup nutritional yeast
2 1/4 cups vital wheat gluten 

Directions: 
This one is super easy. Put all ingredients into a food processor and mix until smooth! You can also smash everything together with a potato masher or with your hands. The food processor will make the smoothest, most consistent dough. It may work best to put the beans and all ingredients except the gluten and nutritional yeast into the food processor first and process until smooth, then add the nutritional yeast and gluten until it is mixed it. 

Now you will place the dough onto a lightly floured surface, and gently knead just enough to make sure there are no dry spots. Then I use a rolling pin to roll out to a rectangle that is about 3/4" thick. I then I begin at one of the long edges and roll into a long tube, similar to making cinnamon rolls. Once it is rolled up tuck the ends under a bit to make them even and smooth. Then wrap tightly in a large piece of aluminum foil, twisting the ends like a candy wrapper. You do want to wrap this tightly - just like the other recipe, seitan loves to grow when it's cooking. If you don't wrap this tightly it will bust out one of the sides, and you'll have an awkard shaped, lopsided loaf. 

You can also cut the dough into pieces, and make smaller, sausage-style logs instead of one big loaf. 

Then you will place this in a large steaming pot and steam for an hour. The seitan will be great just like this, however to be a little more like tofurky, I open the foil, baste with half of the mixture described below, wrap in foil and bake at 375 degrees f for 20 minutes, then uncover, rotate, baste with the remaining mixture and bake uncovered for another 10 minutes. 

Tofurky-style baste: 

3 Tbsp Olive Oil
1 Tbsp Braggs Liquid Aminos 
1/2 tsp ground sage 
1/4 tsp ground thyme 


Phew! That should be enough seitan to keep you busy for this week. Next Sunday, for Sundays from Scratch,  I plan to have a post - with pictures! - of delicious lentil burgers with home-made buns!


Tuesday, July 15, 2014

Muffins Muffins Muffins!!

This summer I've finally become interested in cooking a little more... most likely due to not having my head full of school related things. It is way past time for me to post some recipes. I have a couple of seitan recipes I've been wanting to write up, and also a couple of muffins recipes which I'll be sharing today! I've had more than a couple of friends asking me to post muffin recipes, so thanks to their insistence I'm getting over my blogging laziness and putting myself to the keyboard!

Before I get to the recipes, I do have to take a little detour to mention that I'm finally an aunt! My brother and his wife recently had a baby boy, and he's so adorable! Its wonderful to be able to hold a baby, bathe in his cuteness and new baby smell. I admit for about one tenth of a second it made me want another baby... I think I'm over that craziness now, but my kids and I are loving having this little one in the family!!

OK, on with the food!

Firstly, I'll post my standard go-to muffin recipe. When my kids ask for muffins its usually these they are referring to, although I do have another banana muffin recipe I do sometimes use as well. This recipe comes from years of experimenting and mixing up other recipes, and I think they turn out quite delicious. I often double, or sometimes even triple this recipe depending on how many ripe bananas we have. Sometimes my kids will purposely NOT eat bananas so that I can make these muffins - the little big one has even chewed us out for eating bananas before because she wanted muffins! If you have a lot of bananas but do not want to make a lot of muffins all at once, you can freeze the batter in a freezer bag. Then when you wake up feeling like some muffins you just have to snip the corner off the bag and squeeze it into the muffin cups - super easy! So, without further ado...


"Best Ever" Banana Muffins (or bread!)

Ingredients**:
2 ripe bananas - the more brown spots the better!
2 tbsp ground flax seed
3/4 cup soy milk or almond milk
3/4 cup sugar
1/2 cup softened margarine (I suggest Earth Balance!) or vegetable oil
2 tsp vanilla

1 tsp baking soda
1 tsp salt
1 3/4 cups unbleached flour

1/2 cup mix ins of your choice (entirely optional) Try walnuts or pecans, or chocolate chips!

Directions: 
Preheat oven to 325 degrees Fahrenheit.

Easy directions: Mash bananas, mix everything together, put into greased muffin pans and bake for 30-35 minutes! (It really is that easy!!)

More detailed directions:
This is very specifically how I do it. Put bananas in a large mixing bowl. Mash them with a potato masher as well as you can. If some small lumps persist, thats ok! Add the rest of the "wet" ingredients  - those in the top list - and mix together.
Separately sift or whisk together the dry ingredients - those in the 2nd list. Add the dry ingredients to the wet and stir until completely combined - there should be no dry spots. Stir in any mix ins you may want to use.
Spoon into greased muffin pans, filling about 3/4 full. Place in center of heated oven and cook until golden brown, and a toothpick inserted comes out clean... although if you stick it through a chunk of banana it might not be entirely clean!  In my oven this takes about 35-40 minutes, but check them at 30 or so if your oven runs warm or things usually cook quicker... I think my oven is slow!

To make banana bread instead of muffins, just pour batter into greased loaf pan and bake for about 1 hour and 20 minutes, or until top splits open and is a golden brown color.


Since I like I give options, I'm going I include 2 more muffin recipes for you!! The mixing directions are the same, but the baking temp and times are a little different, so make sure to note that. 

My next recipe for today is one of my favorites, since in some ways I'm like most girls and just need some chocolate once in a while. These are a bit drier, so if you like the moister muffins consider upping the amount of liquids, either milk or oils. I have I experiment with that and maybe I'll update you all if I do, but I think they're great how they are. 

Chocolate Chip Muffins

Ingredients**
3 ripe bananas
1 1/4 cup soymilk combined with 1 tsp apple cider vinegar - let sit a few minutes 
1/4 cup vegetable oil 
1 tsp vanilla 
1cup sugar
2 tbsp ground flax 

2 cups unbleached flour 
1 tbsp baking powder 
1/2 tsp salt
1/4 cup cocoa powder 

Mix in 1/2 cup semi-sweet chocolate chips 

For this one, bake at 400 degrees Fahrenheit for 20-25 minutes, until tops are browned and cracked a bit. 


The next muffin recipe is my big one's favorite, probably because of the crumb topping on it, which could easily be put in top of any muffin before baking. I mash the blueberries with a banana, only because she doesn't like to get a big bite of blueberry in her muffin. You could also try using 1/2 cup of applesauce if you don't have a banana. 

Blueberry Muffins

Ingredients:

1 ripe banana 
1 cup blueberries 
1/3 cup soymilk 
1/3 cup veg oil 
3/4 cup sugar 
1/4 cup ground flaxseed 
1 tsp vanilla 

1 3/4 cup unbleached flour
1/2 tsp salt 
2 tsp baking powder 

Crumb topping:
1/4 cup sugar
1/8 cup flour 
2 tbsp margarine 
3/4 tsp cinnamon 
2 tbsp wheat germ (optional) 
- combine dry ingredients and crumble in margarine with fingers until it resembles coarse crumbs. Sprinkle on top of muffins before baking. 

For these, bake at 400 degrees Fahrenheit for about 25 minutes. 


I hope you enjoy your muffins!!! If you have any trouble or questions about any of my recipes please don't hesitate to send me a note!


**A note about ingredients:
I use ground flax seed ALL THE TIME, in almost everything I bake, except yeast bread. And I add it to pancakes and waffles, and sometimes smoothies. It is a great source of Omega-3 essential fatty acids and fiber, which is amazingly good for you. It does have a flavor that can be tasted in pancakes and smoothies, although I really don't notice it as much in muffins. You may not be able to find ground flax seed - I usually buy it at Costco, or in a health food store, but more and more chain grocery stores are carrying it. Usually its with the Bob's Red Mill products and/or on the baking aisle.

If you cannot find ground flax seed, or are for some reason particularly averse to using it, you may substitute a couple of heaping tablespoons of applesauce. You can also do this in place of oil or butter, if you want to cut the fat content down. I have not yet tried this with either of these recipes, but I have used applesauce in other baking recipes and it usually works pretty well.

As far as flour goes, I usually do 1/2 unbleached, 1/2 white whole wheat if I have it. Using all unbleached or all white whole wheat is perfectly OK as well. I have not ever tried baking with any kind of gluten free flour, so I can't make any suggestions there.

Tuesday, January 7, 2014

My first published pattern!

What a great way to kick off the new year - with my first published pattern!
Publishing patterns and selling some of my handy work is one of my main goals for this year. This hat in particular I actually made a year ago! I think it's about time I get my stuff together and get this pattern out in the world!

Since it is my first pattern it is available for free. In the future I will be publishing patterns for sale as well. So stay tuned for more!

The Montana Hat!! 


Details: 
This hat was inspired during a road trip to Montana in Jan 2013. I needed a beanie; it needed to be simple, but not plain stockinette, and something I could make while being a passenger for a couple of days. This hat turned out perfect, and kept my noggin plenty warm while playing in the snow!

Gauge: 17 sts x 27 rnds = 4” in stockinette

Size:
Measures 16” circumference, unstretched. Can easily be made larger or smaller by changing the size of the stockinette section. I recommend changing stitch count in multiples of 4, to maintain the 2x2 ribbing for the brim.

Materials:
  • 1 skein (approximately 200 yards) worsted weight wool. Pictured in Malabrigo Merino Worsted in the Glazed Carrots colorway.
  • Size US9 needle for preferred method of working in the round.
  • Tapestry needle for weaving in ends
This pattern has both written and charted directions. For ease of printing, all written directions are on page 2, and all charted directions are on page 3, so you can print only the page you prefer to use! 

Download the pattern here: download now


Friday, September 13, 2013

{this moment}

. . . . . . . . .

{this moment}

A Friday ritual. A single photo - no words - capturing a moment from the week. A simple, special, extraordinary moment. A moment I want to pause, savor and remember.

If you're inspired to do the same, leave a link to your 'moment' in the comments for all to find and see.

. . . . . . . . . .


- Participating with Soule Mama at: http://www.soulemama.com/soulemama/2013/09/this-moment-1.html#sthash.ObMGAlM7.dpuf

Friday, August 16, 2013

{this moment}


. . . . . . . . . .

{this moment}

A Friday ritual. A single photo – no words – capturing a moment from the week. A simple, special, extraordinary moment. A moment I want to pause, savor and remember.

If you’re inspired to do the same, leave a link to your ‘moment’ in the comments for all to find and see.

. . . . . . . . . .
Inspired by SouleMama:
http://www.soulemama.com/soulemama/2013/08/this-moment-1.html


Thursday, August 15, 2013

Out the Front Door

Snapshots of the beautiful, crazy world right out our front door.
If you’d like to share some of your own photos, please leave a link in the comments!


The merging of seasons - late summer lillies opening in the mist of cool early autumn mornings.

{Out the Front Door with Homestead Honey - http://homesteadhoney.wordpress.com/2013/08/14/out-the-front-door-3/}

Saturday, August 10, 2013

The End Has Come

My summer has ended. The weather is hotter than ever, but classes have resumed and I find myself doing calculus on Saturday afternoon instead of spinning, or knitting, or going to the beach.

While I'm not a huge fan of summer (this "hotter than ever" is only 85 degrees, but I'm dying), I will miss the free time summer brings for a teacher. And it further saddens me as I realize that school starting so early gives a false illusion that fall is near. In southern California it will still be hot through September, and most likely through October as well. Looking on the bright side, I suppose that gives me time for another summer shawl or pair of socks before I start craving warm, cozy sweaters on the needles... the crisp mornings have already gotten me antsy to cast on my little man's new Malabrigo sweater. Admittedly, it doesn't take much to make one want to make anything out of Malabrigo, and those crisp mornings are over by 9 am.

Rather than continue lamenting the slow change from hot to cold here where the sun is king, I am going to leave this post with a few picture of summer fun. I hope this finds you enjoying the warm days.


Saturday, August 3, 2013

Absence and the heart

Well, in my world summer has come to an end. It was a very quick and eventful summer, but I have rushed back to school and been thrown back into work in full force.

This year we started school with a conference. I spent 4 days and 3 nights away from my babies. Going there I thought "Finally I will get to sleep! I won't have anyone crawling on me or kicking me!"

Despite my comfy bed in the ultra-plush hotel they had us in, I hardly slept a wink. I couldn't wait to get home and be surrounded by my babies! When we finally made it home, I forced them all to sleep in my bed - they didn't have a choice. And I had the best night's sleep I've had in a long time ... I sure missed these guys.


Saturday, July 6, 2013

{This moment} (a day late)

A Friday ritual. A single photo - no words - capturing a moment from the week. A simple, special, extraordinary moment. A moment I want to pause, savor and remember.

{joy of seeing dad after a 3 week journey of 5,627 miles}

Friday, June 21, 2013

{This moment}

{this moment} - A Friday ritual. A single photo - no words - capturing a moment from the week. A simple, special, extraordinary moment. A moment I want to pause, savor and remember.

Sunday, June 16, 2013

Knitters in the making

It's been a whirlwind of a spring around here. Lots of camping, a fiber festival, not to mention testing at school and finishing up the school year. I can't believe summer is upon us already - although I'm very grateful for the break from school. I'll be spending lots of time with family this summer, and will post pics of our long road trip along the way

Today though I wanted to be sure to share some pictures of my knitters in the making. My 5 year old FINALLY decided she wants to learn how to knit. I bought her Annie and the Swiss Cheese scarf (which is a fabulous book and you should all buy it right now!) along with some pink yarn and beautiful needles for her birthday on January first. It took her a few months, but now she loves "to yarn". She especially likes to work a row of her knitting when I read to her before bed and to bring her knitting with her in the car. Although, she says she doesn't work on it while the car is moving because it's too dangerous.

Her knitting is beautiful for a beginner. Nice and even. It has inspired her older sister (10) to pick up her needles again and start knitting, trying especially hard to keep it as beautiful and even as her little sister's knitting.

I love my girls. (for the record, I love the boy too.)


Saturday, April 13, 2013

Enjoying the spring time

Wow. I really thought I'd blog more now that I do it from my phone, and it's been a month and a half. Sheesh.

We have been busy getting outside and enjoying the spring time. I have been baking some yummy bread and muffins, hopefully a recipe will come your way soon but I still want to perfect it. I've also been knitting a bit, of course, but I'm planning to submit my latest project to be a published pattern, so no pics of that either.

I did finally finish the lace weight sweater for my big one. She loves it! The yarn is Madtosh lace, in Cousteau which is the most beautiful color. I want a sweater for myself out of that color! I haven't made the little chains to cinch up the sleeves, but she wears it all the time already.

I'm keeping this short and sweet and leaving you with my fav pics of spring so far. Hope you have some nice weather and beautiful flowers coming your way soon!


Thursday, March 7, 2013

Stitches!

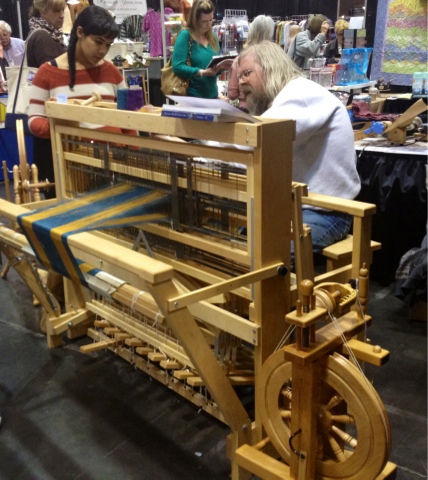
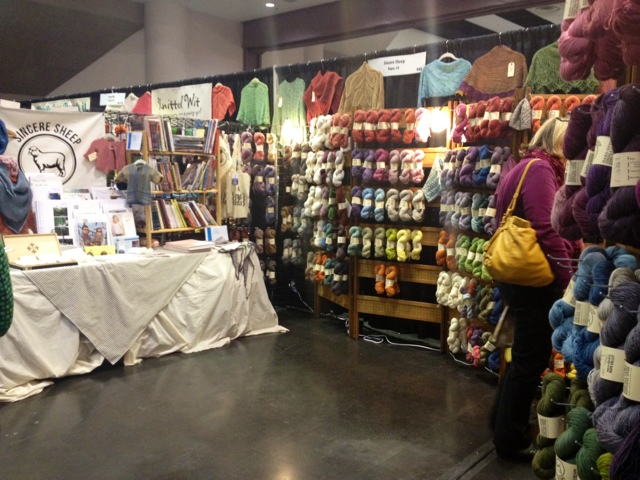
Finally, two weeks later, I get a chance to sit down and write about Stitches West. I have quite a few pictures to share, but they don't come close to the fun of being there in the marketplace. Everywhere you look there are creative people donning their finest knitwear - shawls and sweaters in all directions!

My first stop was to see Alana Dakos (http://nevernotknitting.blogspot.com/?m=1) and have her sign my daughters' copy of Annie and the Swiss Cheese Scarf. This book is wonderful!! My daughters both love it and have been so inspired by the story, the beautiful artwork and the goodies that come with the deluxe pack. Alana and I chatted and shared pictures of our girls. If you're a knitter with a young one in your life - or maybe a child who once was young and learned to knit, but is now not so young - you need to buy them this book. And maybe one for yourself. It is a beautiful, touching story with excellent artwork. https://anniecanknit.com/

While walking around I ran into Jasmin and Gigi of the Knitmore Girls podcast and had the great fortune to meet little Danger Mouse and tickle her toes. Unfortunately I did not get a picture of these lovely ladies and their beautiful hair, but we did get to discuss the methods behind Jasmin's gorgeous pink locks.

Wandering around the market of course led to some yarn acquisitions... I brought home a few beautiful skeins of yarn, including some mini skeins from Oink Pigments (http://www.oinkpigments.com/p/online-store.html?m=0), a beautiful rusty cashmere-merino-nylon blend from Western Sky Knits which had some of the most wonderful yarn (http://www.westernskyknits.com/), a d if course two skeins of Blue Moon Fiber Arts BFL Sport - enough for a sweater. (http://www.bluemoonfiberarts.com/newmoon/). Also, I couldn't help but bring home a few skeins if Malabrigo (http://www.malabrigoyarn.com/) of which one skein I wound up and cast on some fingerless gloves immediately. The rest will be a sweater for my little man. My yarn purchases are now being lovingly displayed in my hutch, calling to me every time I walk by. However, I resist the urge to cast on anything new until I finish the sweater for my big one.

Now, on with the pictures!